Oracle Cloud Always Free Tier
Introduction
Hi everyone! I’m really excited to talk about Oracle’s Free Always Tier. When you hear “free cloud compute,” you might expect some kind of catch or feel like you’re wading into too-good-to-be-true territory. Trust me, I had those same doubts! And yet, here I am, using their free offering regularly at absolutely no cost.
Why?
I have found navigating through figuring it out, some of the resources are a bit outdated or do not reflect the current status quo. Therefore, I wanted to share my experience in utilizing one of the resources offered by Oracle Cloud.
Note 1: When you lock in the region for always free resources when you are first creating your account, you are always in that region. However, the free resources can be scarce in that region, so keep that in mind
Note 2: I will assume you have already created an oracle cloud account.
Out of Capacity
Unfortunately, I was unable to create it with the free account and always had "Out of Capacity" message. Only way to overcome this was to upgrade to Pay-As-You-Go account and when you do, you need to set limits for billing, as a precaution. Nevertheless, you should still have a free instance.
Let's Start
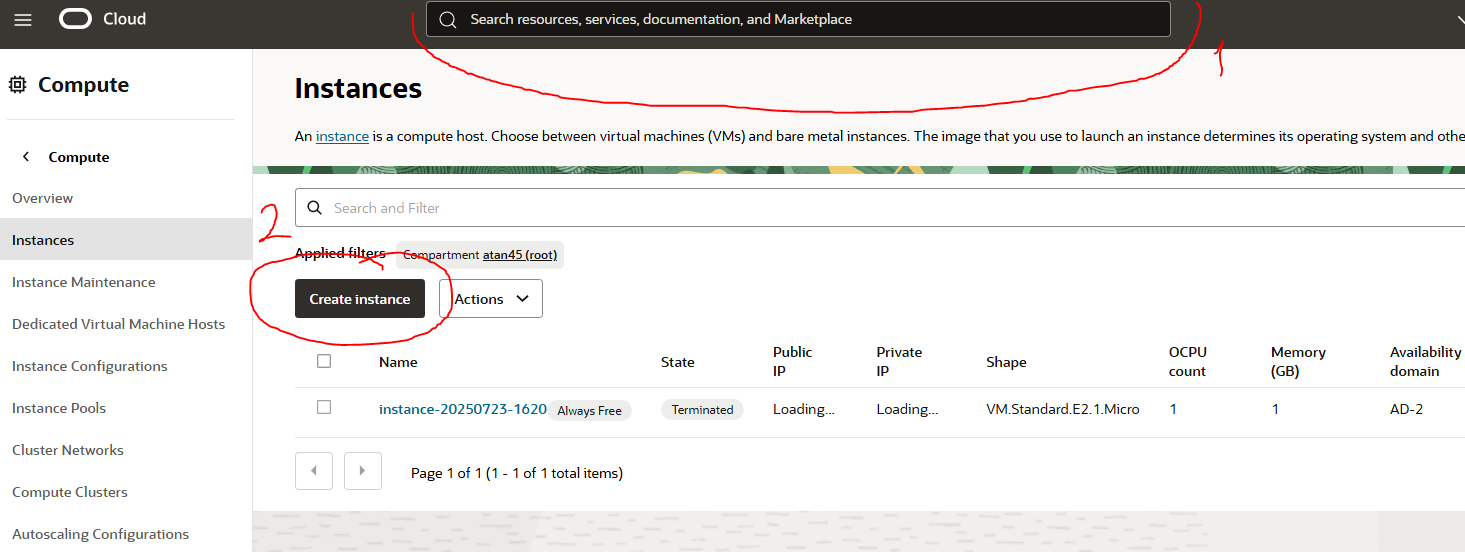
- Search for the "Instances" in the search area.
- And click on "create instance"
- Click on "Change Image" and as I will be choosing an Ampere Instance (as AMD instances were not available in my region), I will select "Canonical Ubuntu 24.04 Minimal aarch64"
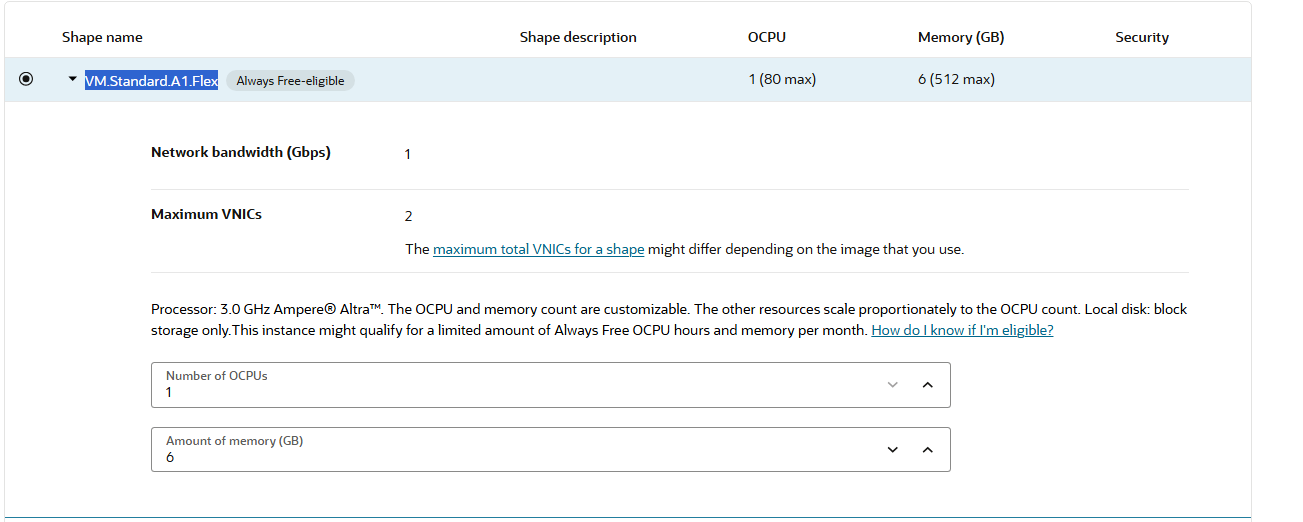
- When selecting Shape, choose "VM.Standard.A1.Flex"
- Now, you have to select Number of OCPUs and GB
- Just as a reminder the "Always Free" tier is "3,000 OCPU hours and 18,000 GB hours per month" for Ampere which roughly translates to 4OCPU/24GB 1 machine or can be further divided to more VMs.
- Just as a reminder the "Always Free" tier is "3,000 OCPU hours and 18,000 GB hours per month" for Ampere which roughly translates to 4OCPU/24GB 1 machine or can be further divided to more VMs.
- From there, you can go with default values. Then create a new VCN or use an already existing one under "Networking"
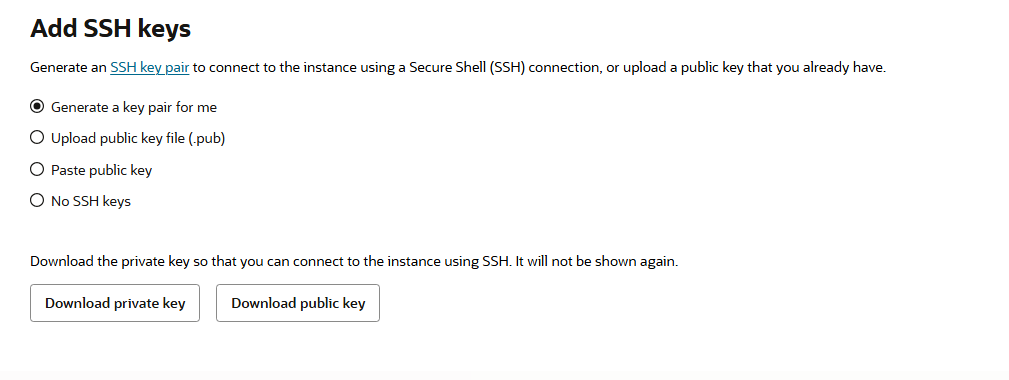
- Then you need to generate a new ssh key and make sure to download the private key as this will be the only place where you can download it. (Also, make sure you have a backup in a safe place as this is the key to accessing your machine in the future).
- Select custom storage size of 200GB which keeps you in always free tier.
- Create the instance, and viola! now you are able to ssh into the instance.


